오픈스택 수동 설치 실습 #.7

오픈스택 수동 설치 실습 #.7 – Glance 설치
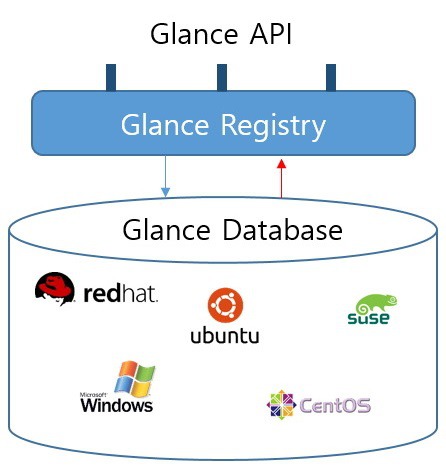
오픈스택 이미지(Glance)는 디스크 및 서버 이미지를 위한 검색, 등록, 배급 서비스를 제공합니다. 저장된 이미지들은 템플릿으로 사용이 가능합니다. 수에 제한이 없는 백업본을 저장하고 카탈로그화하는데 사용할 수도 있습니다. 이미지 서비스는 Swift를 포함한 다양한 백엔드에 디스크와 서버 이미지들을 저장할 수 있습니다. 이미지 서비스 API는 디스크 이미지에 관한 정보를 조회하기 위해 표준 REST 인터페이스를 제공하며 클라이언트가 이미지를 새로운 서버에 스트리밍할 수 있게 합니다.

Glance는 기존의 레거시 인프라스트럭처에 수많은 개선 사항을 추가하고 있습니다. 이를테면 VMware와 연동할 경우 Glance는 고가용성 및 동적 자원 스케줄링(DRS)인 vSphere 계열에 대한 고급 기능들을 도입하고 있습니다. vMotion은 하나의 물리적인 서버에서 다른 서버로 서비스 방해 없이 실행 중인 VM의 실시간 마이그레이션을 수행합니다. 그러므로 동적이고 자동화된 자체 최적화 데이터센터를 가능케 하며, 다운타임 없이 성능이 떨어지는 서버들의 하드웨어 유지보수를 허용합니다.
Heat와 같이 이미지와 상호작용이 필요한 다른 오픈스택 모듈들은 Glance를 통해 이미지 메타데이터와 통신해야 합니다. 또한, 노바는 이미지에 대한 정보를 표시할 수 있으며, 인스턴스를 만들기 위한 이미지의 변경 사항을 구성합니다. 한편, Glance는 이미지를 추가, 삭제, 공유, 복제할 수 있는 유일한 모듈입니다.
Glance 설치 준비
SQL DB에 접속하여 glance database 및 유저를 생성합니다. DB계정에 대한 password는 보기 편하게 user와 동일하게 설정 했습니다.
# su - postgres
$ psql
keystone 데이터베이스 및 유저 생성
postgres=# CREATE ROLE glance WITH LOGIN;
postgres=# CREATE DATABASE glance;
postgres=# GRANT ALL PRIVILEGES ON DATABASE glance TO glance;
postgres=# ALTER USER glance WITH ENCRYPTED PASSWORD 'glance';
glance 계정으로 DB 접속이 되나 확인합니다.

keystone 인증을 합니다. 앞으로는 다른 API 모듈을 설치하기 위하여 keystone 인증을 반드시 진행해야 합니다.
# . admin-openrc
glance 유저를 생성합니다
$ openstack user create --domain Default --password-prompt glance

glance 유저에 admin 권한을 추가 해줍니다.
$ openstack role add --project service --user glance admin
이미지 서비스를 생성합니다.
$ openstack service create --name glance \
  --description "OpenStack Image" image

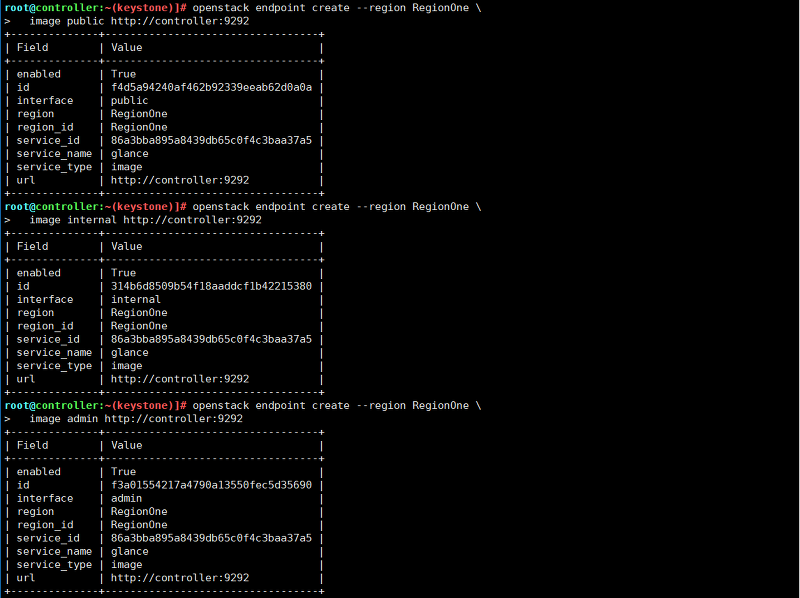
Glance의 endpoint API를 생성합니다.
$ openstack endpoint create --region RegionOne \
  image public http://controller:9292

$ openstack endpoint create --region RegionOne \
 image internal http://controller:9292

$ openstack endpoint create --region RegionOne \
 image admin http://controller:9292

Glance 설치 및 설정
# yum -y install openstack-glance
glance-api.conf 파일 수정. <GLANCE_PASS>부분에는 glance의 패스워드를 넣어주세요.
# vi /etc/glance/glance-api.conf

[database]
# ...
connection = postgresql://glance:glance@controller/glance

[keystone_authtoken]
# ...
www_authenticate_uri  = http://controller:5000
auth_url = http://controller:5000
memcached_servers = controller:11211
auth_type = password
project_domain_name = Default
user_domain_name = Default
project_name = service
username = glance
password = <GLANCE_PASS>

[paste_deploy]
# ...
flavor = keystone

[glance_store]
# ...
stores = file,http
default_store = file
filesystem_store_datadir = /var/lib/glance/images/
glance-registry.conf 파일 수정. <GLANCE_PASS>부분에는 glance의 패스워드를 넣어주세요.
# vi /etc/glance/glance-registry.conf

[database]
# ...
connection = postgresql://glance:glance@controller/glance

[keystone_authtoken]
# ...
www_authenticate_uri  = http://controller:5000
auth_url = http://controller:5000
memcached_servers = controller:11211
auth_type = password
project_domain_name = Default
user_domain_name = Default
project_name = service
username = glance
password = <GLANCE_PASS>

[paste_deploy]
# ...
flavor = keystone
Glacne DB에 테이블 설치
# su -s /bin/sh -c "glance-manage db_sync" glance
glance 서비스 생성 및 실행
# systemctl enable openstack-glance-api.service \
  openstack-glance-registry.service
# systemctl start openstack-glance-api.service \
  openstack-glance-registry.service
정상적으로 Glacne API가 설치 되었는지 확인해야 합니다.
Keystone 인증을 불러옵니다.
$ . admin-openrc
glance에 이미지 추가
cirros 이미지 추가
$ wget http://download.cirros-cloud.net/0.4.0/cirros-0.4.0-x86_64-disk.img
$ openstack image create "cirros" \
  --file cirros-0.4.0-x86_64-disk.img \
  --disk-format qcow2 --container-format bare \
  --public
CensOS 7 이미지 추가
$ wget http://cloud.centos.org/centos/7/images/CentOS-7-x86_64-GenericCloud.qcow2
$ openstack image create \
    --container-format bare \
    --disk-format qcow2 \
    --file CentOS-7-x86_64-GenericCloud.qcow2 \
    CentOS-7-x86_64
이미지 리스트 확인
$ openstack image list
+--------------------------------------+-----------------+--------+
| ID                                   | Name            | Status |
+--------------------------------------+-----------------+--------+
| a76a04d2-34ae-4092-94f3-88352bf79783 | CentOS-7-x86_64 | active |
| f0117caf-e764-487c-849d-b464c79efbd0 | cirros          | active |
+--------------------------------------+-----------------+--------+
Glance 설치가 완료 되었습니다.

최신 댓글